
Showit is an AMAZING website platform, and lucky for you, it makes SEO so easy!
If you’re not familiar with Showit, it’s a newer website platform, but it’s quickly become a favorite for people who work on websites. I’ve helped create a few Showit websites for clients, I’ve created two Showit websites of my own (including the one you’re looking at right now!), and I’ve optimized lots more. I love Showit because you have complete control over the design with their drag-and-drop features, AND the blog is actually on WordPress so you get all the perks of WordPress. And like I said, it’s a great website platform for great SEO.
So if you have a Showit site (or if I convince you to switch to Showit), here are some steps on how to optimize Showit for SEO!
Optimize your images and add alt tags
One reason I love Showit so much is because it compresses images for you! You don’t have to worry about finding and paying for a plugin to do it for you, and it helps speed up your site soooo much (if you want more info on why site speed matters so much, check out my post on SEO strategies to focus on this year).
That being said, you still cannot upload MASSIVE image files because compression can only do so much. I still recommend sizing down your photos and exporting them for websites before you upload them to Showit.
After your (compressed) photos are on your site, make sure you’re adding alt tags, called the SEO Title and Description on Showit. You can find this area when you have selected the image, and click Image on the toolbar on the right hand side of your screen. If you don’t fill anything into the SEO Title and Description, Showit is just going to pull whatever your image title is.
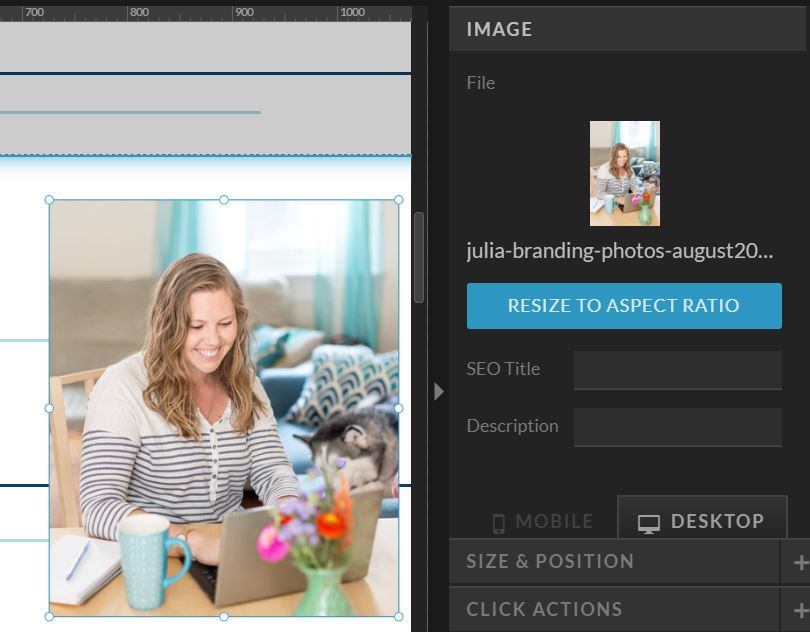
To write a good alt tag, describe your image in a short phrase and don’t include a ton of commas, hyphens, or random keywords. For example, if the image is of a kitchen you designed, write something like “Kitchen designed with teal backsplash and white cabinets in Philadelphia” and not something like “kitchen, kitchen design, interior design, Philadelphia, Pennsylvania designer, blue blacksplash, teal backsplash, green backsplash.”
This is important because:
- Visually impaired people using screen reader software will just be confused (and probably very annoyed) and won’t know what is actually in your picture.
- It looks spammy to Google and probably confuses the Google bots, too. Should they rank that picture in Google Images for “Philadelphia” or for “kitchen design”? Plus, Google is smart and knows that blue, green, and teal are all similar colors!
- Your alt tag is what Pinterest pulls for the pin description when someone pins a picture from your site. The keyword stuffed alt tag is probably also going to confuse Pinterest and look spammy to pinners.
Set up a user-friendly mobile version
One of the coolest things about Showit is that you have COMPLETE control over your mobile version! This is a big reason why I made the switch because my previous website was super limited in mobile design. If you want, you can have completely different desktop and mobile versions.
Mobile design is becoming more important for SEO because more and more people are using their phones over their computers, and Google is starting to focus on mobile versions of sites (which you can see in the addition of Mobile Usability in Google Search Console).

So when you’re creating your mobile site, make sure it’s optimized for the user experience! Make sure your text is big enough to read on small screens, your menu is easy to click on and navigate, you don’t have super long pages that make people scroll for days, you don’t have massive images that take up the whole length of a phone screen, and things like contact forms are easy for people to fill out on their phones.
Fill in your title tags and meta descriptions for every page
If you have a lot of pages this could be tedious, but it is SO important to help you rank and get people to click through to your site!
Title tags and meta descriptions are what is shown when your site shows up on Google. If you don’t fill anything in, Google is going to fill in whatever information they find on your page, which can be COMPLETELY random. I have seen meta descriptions filled with the names of social media icons, the names of images (which are always like “image34195.jpg”), words in the menu bar, and just plain gibberish. It looks unprofessional and spammy to people and could deter them from visiting your website.

This is a real example of meta descriptions for a business before I started working with them! If you are looking for a business and see this information, would you really click through to the site?
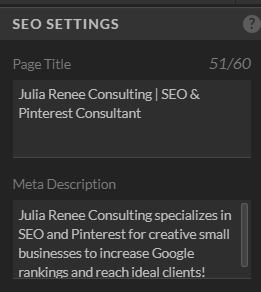
To fill in your title tags and meta descriptions in Showit, go to the page you want to edit and in the toolbar on the righthand side of your screen and click on SEO Settings. There you can fill in the Page Title and Meta Description. Keep your Page Title under 60 characters, and there isn’t a character count for the Meta Description in Showit yet but you’ll want to keep it under 160 characters.
You’ll also see the Share Image, and you’ll want to select a photo because this is the picture that you want to show up when you or someone shares that page on social media.
To find keywords to target for your title tags and meta descriptions, make sure you read my post Tips for Keyword Research!
Use headers correctly
To be honest, I completely messed this up when I was creating my Showit site! (Don’t worry, I caught my mistakes before my site went live). Showit is great because you can completely customize your fonts, colors, and every little thing on your site. But make sure when you’re changing your fonts around, you’re still using the header hierarchy properly.
Headers are the pieces of text that break up paragraphs, and they’re usually bigger and more eye-catching than paragraph text. They’re helpful for search engines to be able to better read and index the structure of your pages and posts.
h1 is the header for your page title, and this is the header that you should ONLY have one of. h2 is for the more important eye-catching text, and the hierarchy follows with h3, h4, etc. p is for paragraph text, and nav is navigation text that links to something.
If you mess it up a little, it’s fine and Google isn’t going to penalize you significantly or anything; it just makes it easier for Google to understand what your page is about, and it helps your readers see the most important parts or the calls-to-action.
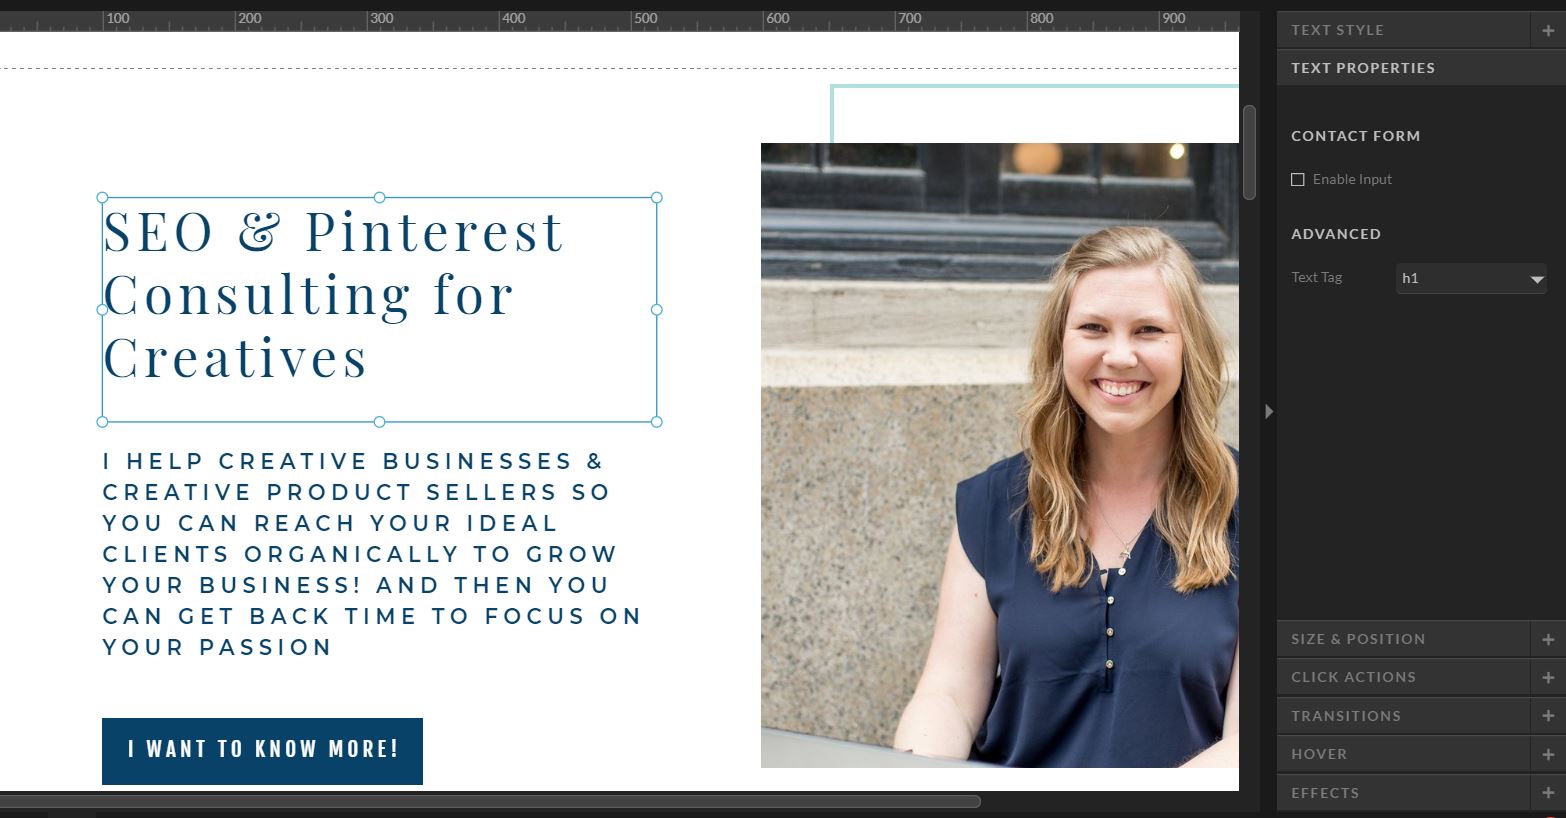
So this is where I screwed it up on my Showit site to begin with. When you add text, the menu lets you select adding a Title, Heading, Subheading, and Paragraph, and you can have different fonts for each type of text. I didn’t realize that each type was connected to a header tag, so if I wanted the look of the font that was connected with the Title text in more than one place on my page, I added multiple “Titles.” So that meant that I had multiple h1 tags on all my pages!
So you don’t make my mistake and confuse the heck out of Google about what your page title is, make sure you change your header tags if you do want to use the Title font in multiple spots. You can do that by selecting the text, and on the toolbar on the right hand side of your screen, select Text Properties. There you will see the Text Tag that allows you to change headers, and you can still use whatever font you want!
Optimize your WordPress blogs
With Showit sites, you get the benefit of having your blog hosted on WordPress! WordPress makes SEO optimization really easy, and you can customize a lot of things with plugins.
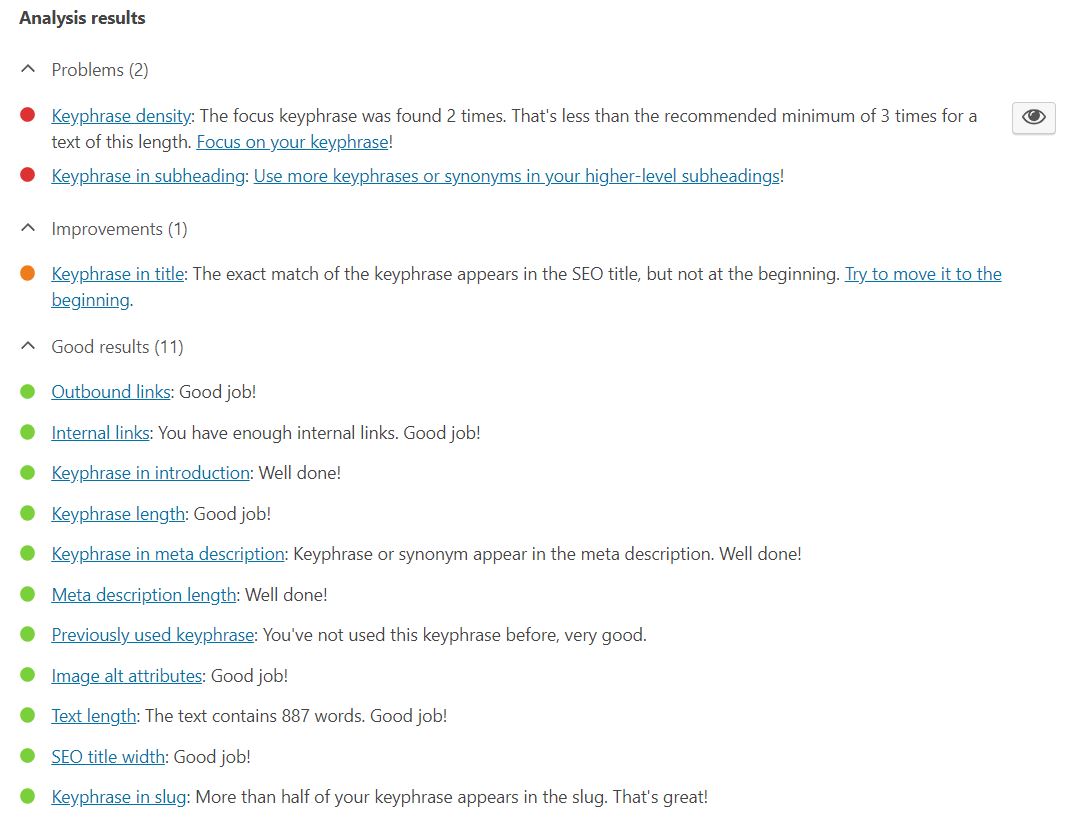
If you have a Showit or WordPress site, you’ve likely heard of the Yoast plugin, which is best plugin for SEO. This is where you can add your title tags, meta descriptions, keywords, and edit information for social sharing. It also has guidance for telling you things like if your sentences are too long, if you’re using enough headers, and if you’re using your keyword enough. It will give you a “green light” if you get everything right, and an orange or red “light” if your post could be improved.
Yoast is great, but I want to emphasize that it is not as smart as Google! For example, Google recognizes keyword variations, but Yoast doesn’t. So if the keyword you’re targeting is “wedding calligrapher in Philadelphia,” Google knows that it’s the same thing as “Philadelphia wedding calligrapher.” But Yoast doesn’t.
So people try to get the “green light” and start writing like robots trying to cram their keywords wherever they can, and it’s not going to help your rankings in Google. Please don’t make yourself crazy trying to get all the “green lights.” Plus, Yoast doesn’t even know if a keyword is good or not! If you use “photographer” a lot in your post, it can tell you that you did a good job, but there is no way you’re going to rank in Google for such a broad keyword like “photographer.” For more on keywords, don’t forget to read my post Tips for Keyword Research!
That was a lot on Yoast, but I just wanted to clarify that it isn’t the same as Google because some people focus too much on it! So that being said, let’s talk about what actually goes into your blog post. If you’re stumped on what to write about, answer a question that you’ve been asked by your audience. Answering a question will help people searching for that answer, and it’s going to show Google and your audience that you’re an expert in your field.
After writing it out, format it with headers like I mentioned before. WordPress calls them Heading 1, Heading 2, etc., but they’re the same thing as the h1 and h2 tags I mentioned before. Add photos in between some paragraphs (and make sure you size them down and use a plugin to compress them), and add alt tags that describe them.
If you want more SEO help with blog posts, check out my free SEO cheat sheet for blog posts!

So that is everything you need to know on how to optimize Showit for SEO! Beyond all the tech stuff, make sure your website is set up with a great user experience to serve your potential clients because that’s really what your website is for.
If you want to make sure your site is optimized properly, check out my SEO audit services to get personalized feedback on your SEO efforts!


